Showing posts with label cherry. Show all posts

Thursday, February 18, 2016

Cherry Pie, Sweetie Heart


... and in everything else... YUM!
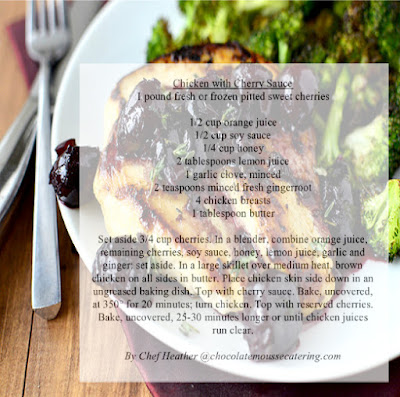
Cherries have a lot of reasons to boast, after all, they do have a long list of nutritional goodness. These small little treats pack a powerful punch for their low calorie count. They are crammed with nutrients that help fight inflammation and cancer. And, in case that wasn't enough, two compounds contained in cherries, have been shown to inhibit the growth of tumors and even cause cancer cells die. These little red jewels also have antiviral and antibacterial properties.

Aim to eat a cup of fresh cherries every day while they are in season, and when they are not... make sure you have a stash in your freezer.  Doing this can help your body reduce inflammation and curb pain. Regular consumption may also lower risk of heart attack and stroke.

Tips:

Keep a bag of frozen cherries in your freezer year round.  Frozen cherries retain 100% of their nutritional value and make a great addition to smoothies, yogurt, and oatmeal.

Buy organic or wash thoroughly, since conventionally grown cherries can be high in pesticides.

Recipes:

Cherry Chocolate Chip Cupcake
1 1/2 cups all purpose flour
1 1/4 teaspoon baking powder
1/4 teaspoon salt
1/2 cup butter, room temperature
1 cup sugar
1 large egg
1 teaspoon vanilla extract
1/4 teaspoon almond extract
1 cup buttermilk
1 cup finely chopped fresh pitted cherries
1/2  cup mini chocolate chips (optional)

-Preheat oven to 350 degrees F. Line your cupcake/muffin cups with paper liners. Set aside.
-In a medium bowl, combine the flour, baking powder and salt.
-In a large bowl, cream together butter and sugar.
-Add egg, and extracts and combine well. Working in two or three additions, gradually mix in the dry ingredients, alternating with the buttermilk and ending with an addition of the last of the flour mixture.
-Stir in chopped cherries & chocolate chips.
-Fill prepared cupcake liners 3/4 full. Bake for 16-19 minutes, or until the toothpick inserted into the center of the cupcake comes out clean. Let the cupcakes cool before transferring them to a wire rack. Wait until they are completely cooled before frosting.

Friday, November 21, 2014

Pie... the Second Piece


Now that the perfect crust is ready, let's talk filling...  There are many types of pie, fruit, custard, and savory...
In this segment, I am going to focus on fruit pies.  Fruit comes in all shapes, sizes, flavors.  Because of this cooking times and quantity of fruit needed in a pie varies. 
When assembling a pie, apples should fill the crust to an inch above the edge, cherries, blueberries, and similar fruit are filled to just below the rim of the pie pan. The fruit will expand when it gets hot and tends to run out of the edges if overfilled.
Here are guidelines for the quantity of fruit needed for a 9" pie:
Apple: 8 small, 5 large = 6 to 8 cups
Apricot: 10-12 medium = 5-6 cups
Blackberry: 6 (1/2 pint) baskets = 6 cups
Blueberry: 3 pint baskets = 6 cups
Cherry: 1 pound = 6 cups
Peach: 10 -12 small or 6-7 large = 5-6 cups
Pumpkin: 1/2 pound =1 cup
Raspberry: 6 (1/2 pint) baskets = 6 cups
Rhubarb: 6 medium stalks / 5-6 cups
Strawberry: 4 pint baskets = 6 cups
Sweet Potato: 1/2 pound =1 cup
Now that the fruit is picked out, you need a thickener.  Here are some choices:
Cornstarch                                                                                                                                          
is a good thickener to use with fruit to make a filling because it does not have any flavor and creates a smooth texture. It also does not thin when reheating a slice of pie.  Cornstarch has twice the thickening power of flour, but doesn’t work well if the filling is high in acidity.

Tapioca
 is often used because it can hold more fruit juices than other thickeners without becoming rigid.  It is not recommended for a lattice top pie or other open fruit pie, as it hardens when exposed to the hot air of the oven. However, it can be used with a two-crust pie.  Tapioca has no flavor and  cooks quickly. If you use tapioca, let the filling mixture stand for at least 15 minutes before you spoon it into the crust to bake. This will allow for more efficient thickening. When you prepare a pie filling, mix the thickener first with sugar and any spices to prevent lumps and uneven thickening, then add the fruit. Granules are gritty if under cooked but are clear and soft when fully cooked.
Arrowroot                                                                                                                                              
is not a desirable choice because it thickens before the boiling point of fruit fillings in the pies.  It imparts no flavor of its own but provides a high gloss, and just 1 tablespoon will firm up each cup of liquid. It’s fine for high- and low-acid fruit mixtures, but it creates a gloppy mess if mixed with any dairy product.
Potato Starch                                                                                                                                        
this gluten-free starch's main advantage over other starch thickeners is that it's a permitted ingredient for Passover, unlike cornstarch and other grain-based foods. Liquids thickened with potato starch should never be boiled.
Once the fruit and thickener are chosen, all that is left is flavoring with lemon juice, sugar, and spices.  Bake and Enjoy!
Some additional helpful tips:
 
-Bake on a cookie sheet covered in aluminum foil to catch any juices that may run over the edge.
-Rotate the pie 180 degrees midway through baking. This helps the pie to cook evenly and balances the surface browning.
-When cutting, wet the knife with hot water to make a clean cut that won’t tear the filling.
“Cut my pie into four pieces, I don’t think I could eat eight.”
Yogi Berra

Monday, December 6, 2010

Holiday Treats to Make With Your Little Sweets

    Holiday desserts and cookies are often cute, whimsical, and a great celebration of joy and innocense.  Making these wonderful creations are fantastic opportunities to spend time in the kitchen with your little chefs.  BUT... and it's a big one... the holidays are also often filled with guests, stress, and preparation.  So sometimes it's not so easy to get the time to create those sweets with your sweets.  I am going to share some great treats that require no knives or ovens so that you can work on your kitchen preparations, while the kids keep you company and create some great confections.
    I hope your family gets into the kitchen this season.

Cherry Mice                                                                                                                                    
Brown Mice                                                                                                                                        
8 maraschino cherries + stem  
8 chocolate chips
16 almond slices
1/2 c chocolate chips (melted)

White Mice
8 maraschino cherries + stem 

8 white chocolate chips
16 almond slices
1/2 c white chocolate chips (melted)                                                         

1- Drain the cherries and pat dry with paper towels. Line a cookie sheet with waxed paper.

2- Place the chocolate chips in a microwave-safe bowl and heat them until smooth, working in 15-second intervals, stirring between each so as not to burn chocolate.

3- Holding a cherry by its stem, dip it into the chocolate and swirl it around to completely cover the fruit. Set it on its side on the waxed paper and immediately press a chocolate chip onto the cherry for the head. For the ears, gently wedge two almond slices between the chip and the cherry. Repeat to make 24 mice.

4- Refrigerate them until set, about 10 minutes. Keep the mice in the fridge until you're ready to serve them or give them away.

 Optional - Pipe eyes and a nose on the mice

Cheerio Christmas Wreath
                                                         
                                                         2 cups Cheerios Cereal

  1 cup Green Candy Melts
  1Tbl Red Cinnamon Candy

 1- Line 1 cookie sheet with wax paper. Place cereal in large bowl.

 2- Melt candy melts as directed on package. Pour melted candy
     over cereal and toss to mix.

 3- For each wreath, drop about 3 tablespoons mixture onto cookie sheet. With fingers, shape into 3-inch wreath with 1-inch center opening. Immediately decorate with cinnamon candies. Let stand about 5 minutes or until set.

Marshmallow Snow People

1 bag large marshmallows
1/2c chocolate chips, melted
Orange and Brown Icing
Optional - Assorted small candies of your choice
20 8"Lollipop Sticks or Skewers
1-  Skewer 3 marshmallows so that they stack to be your snowman
2- Line a cookie sheet with wax paper. 

3- Cut 3 Marshmallows in half.  Dipin melted chocolate and set on wax paper.  The pooled chocolate will be the brim of your hat.  Let hat dry and stack on your snowman.

4- Decorate with icing or candies.  Some great options are... sprinkles, red hots, pretzels, or M&Ms.
Enjoy!!!


Monday, October 11, 2010

Guiltless Treats

I know, I know... Pies again... but I promise this is my last post on this flakey treat for a while. This week I'd like to introduce you to a formula for healthy but very yummy pastries. Why you might ask... well, thanks for asking... 1/3 of all Americans are obese (a rather frightening statistic). Approximately 80 MILLION Americans go on a diet each year. That means at least one of your Holiday guests will be watching what they eat this year... you may even be monitoring your consumption. You should definately not be penalized with boring and tasteless food just because you want to be healthier. Rather, you should include tasty but healthful dessert choices into your diet. Everyone knows that "absence makes the heart grow fonder", and artificial, sugary snacks are not the healthiest cravings to give in to. That is why I am going to share 3 awesome pastry dough recipes - 1 whole grain - 1 gluten free - 1 Vegan and 3 fantastic and fresh fruit fillings. I hope you take advantage of them. Until next time... Happy Cooking

Whole Grain
2 cups whole wheat flour
1 cup ground oatmeal
1/2 teaspoons salt
1/3 cup vegetable oil
1/2 cup water

Combine the flour, oatmeal and salt in a bowl. Blend in the oil, then add the water

Gluten Free
1/2 cup shortening
1 cup spelt
1/2 cup rice flour
4 tbsp cold water

Cut shortening into flour until a crumb like texture forms.
Add water.
Work dough with hands until soft and form into ball.

Vegan
1 cup spelt flour
1 cup almond flour
3/4 cup coconut oil
¼ teaspoon salt
5 Tablespoons ice water

Chill all the ingredients in the freezer. (Do not allow the water to freeze.)
Mix the flour and salt.
Cut the solid coconut oil into the flour and salt mixture. The dough should be crumbly with crumbs the size of small peas.

Cranberry Apple Pie Filling
1 cup chopped cranberries
1 1/2 cups chopped apples
1/2 cup honey
1 Tbs Whole Wheat Flour
dash salt

Combine cranberries, apples, honey, and salt; cover and let stand 2 hours.
Pour into a 9-inch pie shell.
Cover with top crust, seal, and crimp edges.
Cut small vents in top of pie.
Bake at 450° for 10 minutes.
Reduce heat to 350° and bake 30 minutes longer, until nicely browned.

Cherry Rhubarb Pie Filling
1/2 cup agave
1/2 cup whole wheat flour
1 pound fresh rhubarb, chopped (1/2 inch slices)
2 pints fresh cherries (seeded and cut in half)
2 tablespoons butter
1 egg yolk
2 tablespoons white sugar

In a large bowl, mix flour and agave.
Add strawberries and chopped rhubarb.
Toss fruit with agave and flour and let stand for 30 minutes.
Pour filling into pie crust.
Dot top with butter, and cover with top crust.
Seal edges of top and bottom crust with water.
Apply yolk to top of pie, using a pastry brush. Sprinkle with sugar.
Cut small holes in top to let steam escape.
Bake at 400 degrees F for 35 to 40 minutes, or until bubbly and brown.
Cool on rack

Cheesy Chocolatey Pumpkin
1 cup low fat cream cheese
1/2 cup agave
1 cup canned solid-pack pumpkin puree
2 large eggs
2 tablespoons all-purpose flour
1 teaspoon cinnamon, clove, nutmeg
1/2 teaspoon salt
1/2 cup semisweet chocolate, chopped

Place cream cheese in food processor; blend until smooth. Add agave, pumpkin puree, eggs, flour, spice, and salt; process until combined.
Place chocolate in a microwave-safe bowl; microwave in 30-second increments, stirring between each, until melted.
Add to pumpkin mixture
Pour in pie shell
Bake at 350F until set but jiggles slightly when gently shaken, 40 to 50 minutes.
Cool in pan at least 2 hours

Enjoy!

Chef Heather
The Chocolate Mousse
http://www.chocolatemoussecatering.com/
845-518-6533